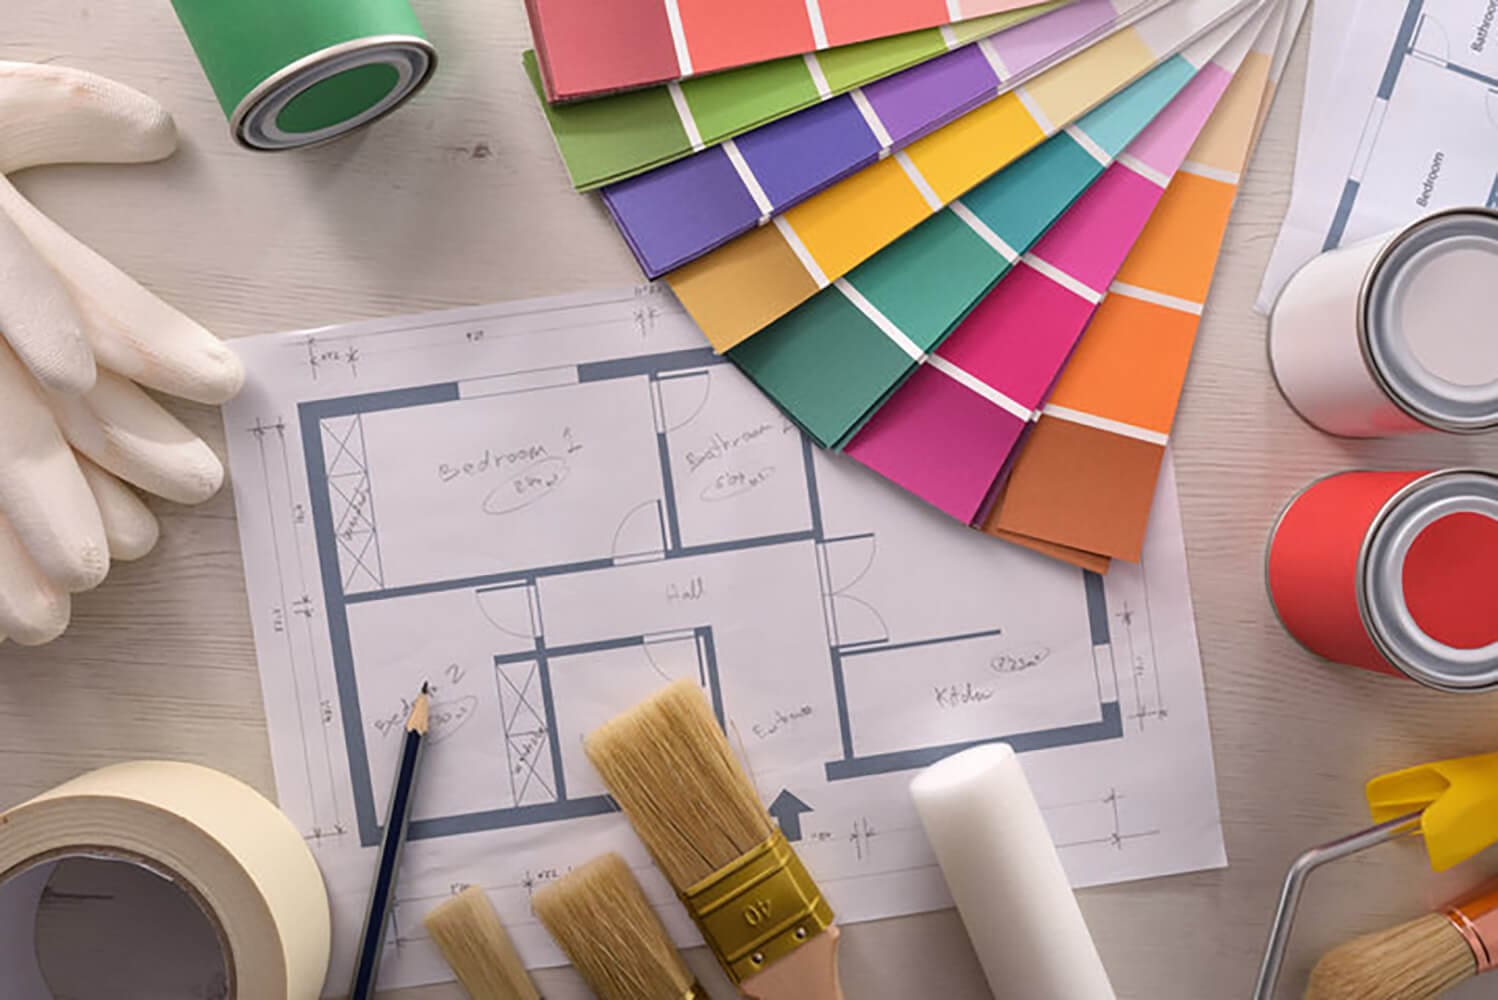
How To Remove Painters Tape
Table of Contents
When you’re tackling a painting project, whether it’s sprucing up a room or adding a touch of color to a piece of furniture, one of your best friends can be painter’s tape. This special tape helps you create those clean, professional-looking lines and protects areas where you don’t want paint. But using painter’s tape isn’t just about sticking it on and painting over it; the real magic happens when you remove it correctly.
In this blog from Prep Smart Painting, we’ll dive into everything you need to know about using painter’s tape effectively. We’ll focus on the best times to take the tape off to ensure a perfect finish, and share easy-to-follow steps on how to remove painters tape
. By the end, you’ll be equipped with the know-how to use painter’s tape like a pro, making sure your next painting project turns out just as you imagined.
What is Painter’s Tape?
Painter’s tape is a special kind of adhesive tape that’s designed specifically for painting jobs. It’s not like your regular tape; painter’s tape is made to be easy to stick on and peel off without leaving any sticky residue behind or peeling off the paint with it. It’s used primarily to block off areas that you don’t want painted, such as trim, windows, and door frames, ensuring that paint only goes where you want it to.
There are several types of painter’s tape available, each suited for different surfaces and purposes. For example:
| Tape Type | Description | Thickness and Width Options | Usage and Features |
| Blue Painters Tape (24900) | Standard blue tape made of saturated crepe paper with a solvent-based natural rubber adhesive. Offers clean, residue-free removal. UV-resistant for up to 14 days of outdoor exposure. | 5.2 mils thick, widths from ½ in to 3 in. | Ideal for various surfaces, including outdoor projects. |
| Super Blue USA Painters Tape (SB621) | High-performance tape for professionals, useful on surfaces like hardwood, wood trim, glass, and drywall. Offers clean removal for up to 21 days, also suitable for polyethylene film and floor markings. | Widths from 1 in to 3 in. | High holding power; does not dry out or leave residue. |
| AquaMask™ Medium-Grade Painters Masking Tape (MTAMI) | Medium-grade saturated crepe paper tape in aqua color. Suitable for masking both water and solvent-based paints. Resists paint flaking and UV exposure for up to three days. | 1 in and 3 in widths, 60-yard lengths. | Good adhesive capabilities on many surfaces; withstands up to 225°F. |
| Glass Cloth Thermal Spray Masking Tape (80907) | Woven fiberglass cloth tape with a high-performance silicone adhesive. Resistant to chemicals and solvents. | 7.6 mils thick, widths from ½ in to 3 in. | Ideal for thermal and plasma spray operations; withstands over 500°F. |
| General-Purpose Masking Tape (MTGPI) | General-purpose beige crepe paper tape with an aggressive pressure-sensitive adhesive. | Widths from 1 in to 3 in. | Useful for a variety of tasks including interior paint masking and packaging. |
| General Purpose Masking (22263) | Utility-grade beige crepe paper tape with a solvent-based natural rubber adhesive. Conforms well and has good holding power. | Widths from ¼ in to 12 in. | Suitable for general-purpose masking applications. |
| Color Masking Tape (25963) | Saturated crepe paper masking tape available in multiple colors with rubber adhesives. Conforms to even and irregular surfaces. | Widths from ¼ in to 12 in. | Great for color coding and versatile applications. |
The Right Time to Apply Painter’s Tape
Applying painter’s tape at the right time and in the right way is crucial for achieving those sharp, clean paint lines that make your project look professional. Here’s how you can do it effectively:
Steps to Apply Painter’s Tape Correctly
- Clean the Surface: Before you even think about unrolling your tape, make sure the surface is clean and dry. Any dust, dirt, or grease can prevent the tape from sticking properly, which might let paint seep under the edges.
- Apply the Tape: Start by peeling off a manageable length of tape—don’t pull out too much at once. Align the tape with the edge of the area you want to protect. Press it down as you go, smoothing it out with your fingers to prevent any wrinkles that could let paint sneak through.
- Seal the Edge: Once the tape is down, use a putty knife or a similar flat tool to press down firmly along the edge of the tape that will border the paint. This helps create a tight seal and prevents paint from bleeding under the tape.
How long to wait
When you paint a surface, the paint needs time to cure, which means it needs to dry completely and adhere firmly to the surface. This curing process involves the evaporation of solvents in the paint, which solidifies the paint film. Applying painter’s tape too soon after painting doesn’t give the paint adequate time to cure, leading to several potential issues:
- Adhesion Issues: Painter’s tape adheres through a gentle adhesive that’s designed not to damage surfaces when removed. Fresh paint is still soft and hasn’t fully bonded with the underlying material. Applying tape to this not fully cured paint can either pull the paint off when the tape is removed or fail to adhere properly, allowing paint to bleed underneath.
- Surface Imperfections: Freshly painted surfaces may appear dry but often contain small imperfections or a slightly uneven texture as the paint dries. These imperfections can prevent the painter’s tape from sealing properly against the surface. The less sticky adhesive on painter’s tape, compared to regular masking tape, might not be able to compensate for these imperfections. This imperfect seal allows paint to seep under the tape edges during a subsequent paint job.
- Release of the Adhesive: The adhesive on painter’s tape is designed to be less sticky so that it can be removed easily without leaving residue or damaging surfaces. On a freshly painted surface, the slight solvents or moisture still evaporating from the uncured paint can interfere with this adhesive, reducing its effectiveness. This reduced stickiness can cause the tape to lift slightly, creating gaps where paint can enter.
By waiting at least 24 hours before applying painter’s tape, you ensure that the surface is fully dry and stable. This waiting period allows the paint to cure properly, providing a solid, smooth surface that supports effective adhesion of the tape and prevents paint bleed.
Here’s a straightforward table format explaining the practical implications of applying painter’s tape to a freshly painted surface without waiting the recommended time:
|
If You Do This… |
Then This Will Happen… |
|
Apply painter’s tape to a freshly painted surface too soon |
Paint Peeling: When you remove the tape, it might pull off the still-soft, uncured paint along with it. This leaves you with a less than perfect finish and possibly damages the surface. |
|
Loose Tape Edges: The tape won’t stick well to a surface that’s still releasing moisture from the drying paint. This can lead to loose edges where paint sneaks under the tape. |
|
|
Increased Paint Bleeds: Without a tight seal due to early application, paint is more likely to seep under the tape, leading to uneven and smeared edges instead of crisp lines. |
|
|
Uneven Paint Edges: The paint under the tape edges can create a jagged look because the tape didn’t adhere well to the surface. This means more work fixing messy lines. |
|
|
Extra Cleanup: Since the paint may bleed or smear, you’ll likely end up spending extra time scraping off unwanted paint and doing touch-ups where the edges weren’t clean. |
|
|
Reduced Visual Appeal: The overall look of your project might suffer. Instead of a neat and professional finish, you could end up with a paint job that looks hastily done and carelessly finished. |
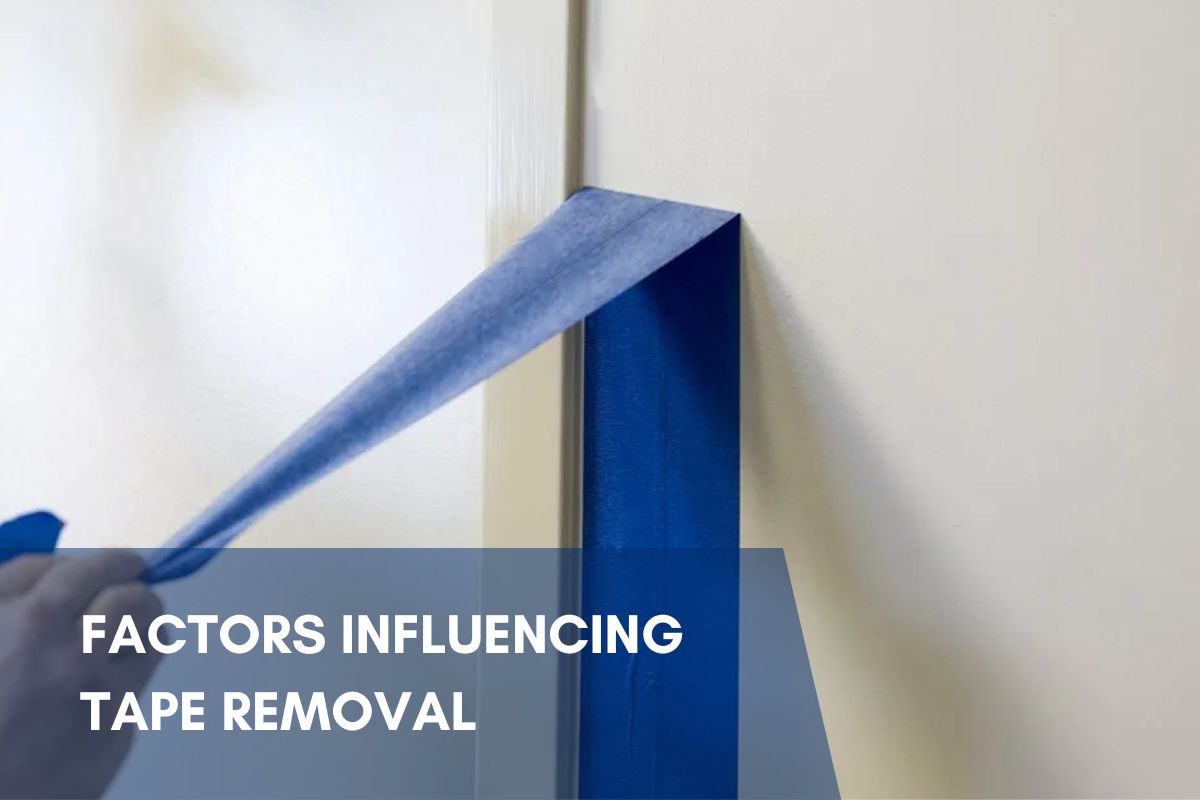
Factors Influencing Tape Removal
Removing painter’s tape might seem straightforward, but several factors can influence how well it peels off and whether it leaves a clean line or not. Understanding these factors can help ensure that removing the tape is as satisfying as pulling off a perfect peel on a new gadget. Here’s what you need to consider:
Type of Paint Used: Oil-Based vs. Water-Based
- Oil-Based Paint: This type of paint tends to create a stronger seal around the tape because it dries slower and forms a harder finish. While this might sound good, the stronger seal can sometimes lead to the paint peeling off with the tape. You’ll need to be extra cautious during removal to ensure it doesn’t pull up the paint along with it.
- Water-Based Paint: Water-based paints are more common in household projects and dry quicker than oil-based paints. They are less likely to peel off when you remove the tape. However, because they dry so quickly, if the tape is left on too long after painting, it can bond with the paint, making removal tricky and potentially damaging the crisp line you worked hard to achieve.
Environmental Factors: Drying Times, Humidity, and Temperature
- Drying Times: Each paint has its own drying time that can influence when you should remove the tape. If the paint isn’t fully dry, you risk smudging it. If it’s overly dry, the tape might pull some dried paint off with it.
- Humidity: High humidity can extend the drying time of paint. This might tempt you to leave the tape on longer, but be careful prolonged exposure to humidity can weaken the tape’s adhesive, making it harder to remove cleanly.
- Temperature: Like humidity, temperature plays a big role. Cold weather can slow down the drying process, while hot conditions can speed it up but also make the adhesive gooey, which can lead to residue when removing the tape.
By considering these factors, you can better plan the best time and method to remove painter’s tape, ensuring that your painting project turns out just as you envisioned, with clean, sharp lines and no damage to the surfaces.
|
Factor |
Description |
Impact on Tape Removal |
How to Deal With It |
Techniques to Apply |
|
Surface Texture |
The roughness or smoothness of the surface painted. |
Rough surfaces may cause tape to adhere unevenly. |
Ensure tape is firmly pressed into surface contours. |
Use a putty knife or razor blade or else a similar tool to press down the tape along uneven surfaces. |
|
Tape Quality |
The grade and quality of the painter’s tape used. |
Lower quality tape may tear easily or leave residue. |
Opt for high-quality painter’s tape known for clean removal. |
Carefully select tape based on reviews and product specifications. |
|
Length of Application |
Duration the tape remains on the surface. |
Longer durations can lead to stronger adhesion. |
Avoid leaving tape on longer than the manufacturer recommends. |
Plan your painting project to allow tape removal at the optimal time. |
|
Paint Thickness |
Amount of paint applied near and over the tape. |
Thicker layers of paint may dry slower at the edges. |
Be mindful of paint application thickness near tape edges. |
Use moderate, even layers of paint to ensure uniform drying times. |
|
Cleaning Before Application |
Surface cleanliness prior to taping. |
Dirty or oily surfaces may compromise tape adhesion. |
Clean and dry surfaces thoroughly before applying tape. |
Use mild detergent and water, then allow the surface to dry completely. |
When to Remove Painter’s Tape
Knowing exactly when to pull off painter’s tape can make all the difference between a paint job that looks professionally done and one that requires a bunch of touch-ups. Let’s break down the best times to remove painter’s tape based on different painting scenarios, and how to tell if the paint is dry enough for tape removal.
Best Timing for Tape Removal
- Between Coats: If you’re applying multiple coats of paint, the best time to remove the tape is after the final coat has been appliedbut timing is key! You should remove the tape before this last coat dries completely. This prevents the paint from forming a film over the tape edge, which can tear and create uneven lines when you remove the tape later.
- After the Final Coat: When you’ve applied the last coat of paint, the ideal time to remove the tape is while the paint is still tacky and not fully dried. This timing helps ensure that the paint doesn’t bond with the tape, which can cause peeling.
Assessing Paint Dryness for Tape Removal
- Touch Test: Gently touch the edge of the paint near the tape. If it feels tacky but doesn’t leave paint on your finger, it’s usually safe to remove the tape. If it’s still wet, you’ll need to wait a bit longer.
- Look for Curing Signs: Depending on the paint type (water-based or oil-based), observe how the sheen changes as it dries. Water-based paints typically lose their sheen as they dry, whereas oil-based paints might darken slightly.
- Check the Time: Refer to the paint can for the manufacturer’s recommended drying times, but remember that environmental factors like humidity and temperature can alter these times.
By following these practical tips, you can achieve sharp, clean paint lines and avoid common pitfalls like smudging or tearing the paint. Remember, the key to a professional-looking finish often lies in the timing of when you remove that tape!
Timing and Technique for Tape Removal
|
Step |
Description |
Reasoning and Tips |
|
1 |
Assess Dryness: Check if the paint feels dry to the touch, usually about an hour after painting. |
Paint that feels dry to the touch is less likely to smudge when you remove the tape. However, complete dryness can bond the tape to the paint, requiring more care during removal. |
|
2 |
Option for Wet Removal: Consider removing the tape while the paint is still slightly wet. |
Removing the tape while the paint is wet prevents the paint from bonding too strongly with the tape, reducing the risk of jagged edges. |
|
3 |
Use of Tools: If the paint is fully dry, gently score along the tape edge with a razor blade. |
Scoring breaks the bond between the dried paint and the tape, helping prevent paint from being lifted off with the tape. |
Step-by-Step Guide to Removing Painter’s Tape
#1 Dry Time (Waiting Period)
- What to Do: Allow the paint to dry to the touch before you consider removing the tape. This is crucial to avoid smearing wet paint. By waiting at least 24 hours before applying painter’s tape.
- Why It’s Important: Dry paint won’t stick to the tape as much, reducing the risk of pulling paint off with the tape. Always check the paint can for the manufacturer’s recommended drying times to get the timing right.
#2 Edge Cutting (Score Process)
- What to Do: Gently use a putty knife or a razor blade to score along the edge of the painter’s tape.
- Why It’s Important: Scoring breaks the seal between the tape and the paint. This prevents the paint from lifting with the tape and ensures the edges of your paint line remain crisp and clean.

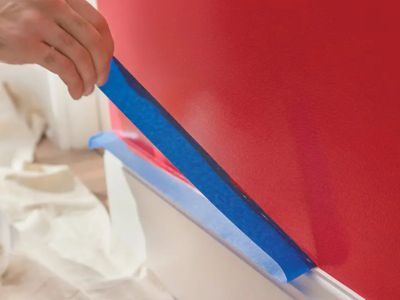
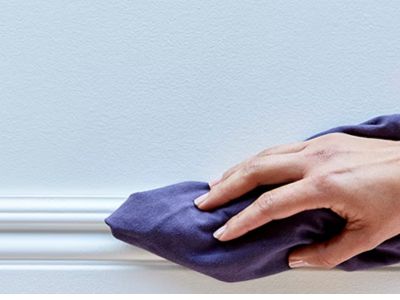
#3 Steady Peel (Removing Tape)
- What to Do: Carefully start to lift the edge of the painter’s tape and slowly peel it back on itself at a 45-degree angle.
- Why It’s Important: Peeling the tape back slowly and at an angle minimizes the tension on the wet paint line, helping prevent the paint from peeling off with the tape. If the tape seems to stick too firmly, pulling it back at a sharper angle, closer to 90 degrees, may help release it more cleanly.
#4 Final Touch (Clean Up)
- What to Do: Once all the tape is removed, inspect the edges for any residue or small flakes of paint.
- Why It’s Important: Cleaning up any residue ensures that the finished lines look sharp and professional. This final touch is what differentiates a neat, tidy paint job from a messy one.
Tips for Effective Tape Removal
|
Step |
Action |
Benefit |
|
1 |
Peel Slowly: Remove the tape gently and slowly. |
Peeling too quickly can tear wet paint or cause the dried paint to chip. |
|
2 |
Angle Your Peel: Always peel the tape back at a 45-degree angle away from the paint edge. |
This angle helps in pulling the tape away cleanly without damaging the painted surface. |
|
3 |
Work in Sections: Handle small sections of the tape at a time. |
This gives you better control and minimizes the risk of accidentally pulling off paint. |
|
4 |
Use a Putty Knife or Razor Blade: For fully dried paint, use these tools to carefully score the edge of the tape. |
Scoring prevents the paint from cracking or peeling with the tape. |
|
5 |
Address Paint Lift: If paint starts to lift with the tape, carefully slice through the lifted paint with a razor blade. |
This technique can help salvage the situation by preventing further damage to the paint line. |
|
6 |
For Multiple Coats: Leave the tape in place if you plan multiple coats, removing only after the final coat. |
This prevents the need for re-taping and ensures sharp lines between coats. |
Here’s a table outlining the potential consequences of not following the recommended steps for removing painter’s tape:
|
Step Missed |
Consequences of Not Following the Step |
Impact on Paint Job |
|
Dry Time |
Removing the tape too early can lead to smearing wet paint. |
Creates messy lines and requires additional cleanup and touch-ups. |
|
Removing tape too late may bond the tape to the dried paint. |
Can lead to paint peeling off with the tape. |
|
|
Edge Cutting |
Failing to cut along the tape edge can pull paint off with the tape. |
Results in jagged, uneven paint lines and potential damage to the surface. |
|
Steady Peel |
Peeling the tape too quickly or not at an angle can tear the paint. |
Leaves a rough, unprofessional finish. |
|
Removing the tape at the wrong angle increases tension on the paint. |
Can pull up large sections of paint, requiring significant retouching. |
|
|
Final Touch |
Skipping final cleanup leaves residue and loose paint flakes. |
Reduces the aesthetic quality and cleanliness of the final paint job. |
What to Do if the Tape Tears or Sticks Too Firmly
If you find yourself in a situation where the painter’s tape tears or sticks too firmly, potentially due to not following the initial removal steps correctly, there are effective measures you can take to mitigate the damage and salvage your paint job. Here’s how to handle it:
If the Tape Tears
- Locate the End: Carefully find the end of the torn tape. Use a putty knife or a similar tool to gently lift the remaining tape without scratching the surface.
- Restart Peeling: Once you’ve secured a starting point, continue to peel the tape slowly. If necessary, use your tool to hold down any paint that might lift with the tape.
- Take Your Time: Proceed with caution and patience. Rushing can worsen the damage by tearing more tape or lifting more paint.
If the Tape Sticks Too Firmly
- Apply Heat: Use a hair dryer on a low heat setting to gently warm the area where the tape is sticking. The heat helps to soften the adhesive, making the tape easier to remove without pulling up the paint. Keep the hair dryer moving to avoid overheating any area.
- Score the Edge: If the paint has dried and bonded with the tape, carefully use a razor blade or a box cutter to score along the edge of the tape. This helps break the bond between the paint and the tape, minimizing paint lifting.
- Peel Carefully: Start peeling the tape back slowly at a 45-degree angle. If resistance is felt, stop and reassess if more scoring or heating is needed.
- Check for Residue: After removing the tape, inspect the area for any adhesive residue. If present, gently clean it off with a mild solvent suitable for the paint type, ensuring not to rub too hard which might damage the paint.
Preventive Measures for Future Applications
- Timing: Always try to peel the tape off at the recommended times typically when the paint is dry to the touch but not completely cured.
- Tools Ready: Have the right tools on hand (putty knife, razor blade, hair dryer) before you start the removal process.
- Quality Tape: Invest in high-quality painter’s tape that is appropriate for the surface and the type of paint you are using.
By following these strategies, you can effectively handle and correct issues with painter’s tape that tears or sticks too firmly, ensuring a clean and professional finish on your painting projects.
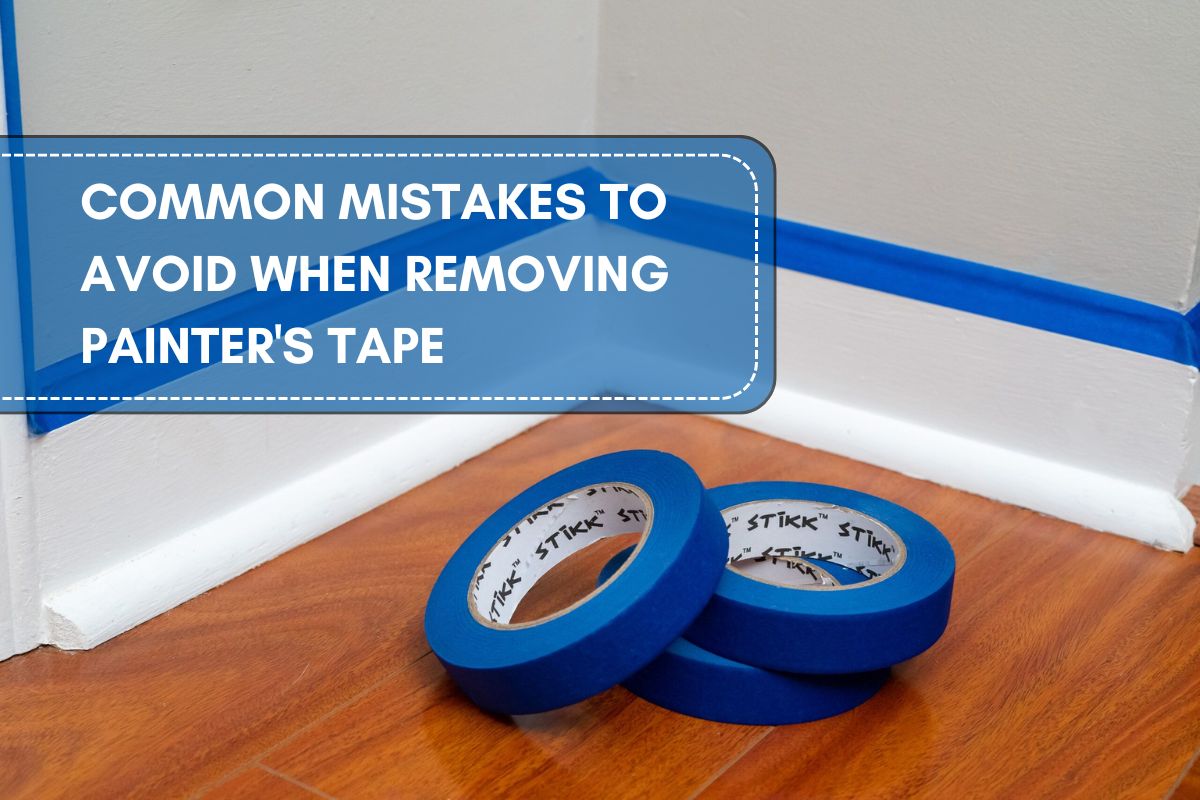
Common Mistakes to Avoid When Removing Painter’s Tape
Removing painter’s tape seems simple enough, but small errors can lead to big frustrations and potentially ruin a great paint job. Here’s an overview of typical mistakes people make when removing painter’s tape, along with practical tips on how to fix these issues if they arise.
Typical Errors in Tape Removal
Removing Tape Too Early or Too Late
- Too Early: Leads to paint smudging or bleeding under the tape.
- Too Late: The paint may dry completely and bond with the tape, causing it to peel off with the tape.
Rushing the Removal Process
- This can cause the tape to tear or jerk, potentially pulling off large sections of paint with it.
Peeling Tape at the Wrong Angle
- Pulling the tape straight up rather than back on itself at a 45-degree angle can lift the paint off the surface.
Using Low-Quality Tape
- Cheaper tapes may leave adhesive residue or fail to create a clean, sharp line, and may tear easily during removal.
How to Fix Issues
Paint Peels Off with the Tape
- Immediate Action: If the paint starts to lift, gently lay the tape back in place and press down the lifted paint with a putty knife or the flat of a blade.
- Repair: Once the paint has re-adhered, carefully remove the tape again. If damage occurs, wait for the area to dry completely, then touch up with a small brush.
Adhesive Residue Left Behind
- Mild Solvent: Use a mild solvent or a specialized adhesive remover on a clean rag to gently dab at the residue. Be careful not to rub too hard as this can damage the fresh paint.
- Warm Water and Soap: If you prefer a less harsh method, use warm soapy water and a soft sponge to gently wipe away the residue.
Preventive Tips
- Proper Application and Removal Timing: Ensure the tape is properly adhered by pressing it down firmly at the time of application and remove it at the optimal time according to the paint type and environmental conditions.
- Quality of Tape: Invest in high-quality painter’s tape that is suitable for your specific painting project. Higher quality tapes are less likely to leave residue and more likely to peel off cleanly.
- Preparation: Always clean and dry the surface properly before applying painter’s tape. This ensures the tape adheres well and removes cleanly.
By understanding these common mistakes and knowing how to fix them, you can ensure that your painting projects turn out as flawless as planned. Always take your time with tape removal it’s the final step in securing a professional-looking finish.
Preparation Before Painting
Proper surface preparation is crucial before you begin any painting project, especially before applying painter’s tape. Here’s a concise breakdown of the steps and their importance:
- Cleaning: Always start by thoroughly cleaning the surface you plan to paint. Remove all dust, dirt, and grease. This can be done using a mild detergent or a specialized cleaning solution depending on the surface material.
- Drying: After cleaning, ensure the surface is completely dry. Any moisture can hinder the adhesive qualities of painter’s tape, leading to weak adhesion that allows paint to seep under the tape.
- Smooth Surface Check: Check for any cracks, holes, or uneven areas. Patch and sand any imperfections to ensure the tape sticks uniformly across the surface.
- Debris-Free Environment: Lastly, ensure the area is free from dust and airborne particles that could stick to the tape’s edge and prevent a clean line.
Taking these steps helps ensure that the painter’s tape adheres securely, providing a tight seal that prevents paint bleed and results in clean, sharp lines upon removal. Proper preparation not only elevates the quality of your paint job but also simplifies the process, making tape removal smoother and more effective.
Professional Painters in Rhode Island emphasize the importance of thorough preparation. They recommend making sure surfaces are clean and dry before applying the tape. Similarly, Professional Painters in Connecticut advise smoothing out any rough edges and pressing down firmly on the tape to ensure it sticks well. This attention to detail is what sets apart a high-quality paint job. Professional Painters in Massachusetts also highlight that using the right type of tape for your surfaces is crucial for achieving those perfect lines.
By following these tips and taking your time with preparation, you’ll make the painting process easier and achieve professional results. This approach not only makes your paint job look better but also makes the removal of the painter’s tape hassle-free, leaving you with clean, sharp lines.
Choosing the Right Tape for the Surface
Selecting the appropriate painter’s tape for the surface you are working on is vital to ensure the tape performs effectively without damaging the surface upon removal. Here’s a table that outlines the best tape options for various common surfaces:
|
Surface Characteristics |
Recommended Tape Type |
Tape Features |
Ideal Usage |
Additional Considerations |
|
Smooth Surfaces (e.g., walls, doors, windows) |
Blue Painter’s Tape |
Medium-tack adhesive |
Versatile for indoor use on trim, tile, and glass |
Ensure surface is clean to improve adhesion |
|
Delicate Surfaces (e.g., freshly painted walls, wallpaper) |
Scotch Delicate Surface Painter’s Tape |
Low-tack adhesive |
Safe for surfaces at least 24 hours old |
Gentle removal to prevent damage |
|
Rough Surfaces (e.g., brick, concrete, stucco) |
Green Painter’s Tape or Scotch Rough Surface Painter’s Tape |
High-tack adhesive |
Suitable for uneven, textured exteriors |
Provides stronger adhesion to handle texture |
|
Contaminated Surfaces (dirt, oil) |
High-Tack Duct Tape or PE Tape |
Very strong adhesive |
Effective on dirty or oily surfaces |
Ensure minimal contamination for best results |
|
Curved Surfaces (e.g., pipes, rounded corners) |
Flexible Painter’s Tape |
Designed to conform to curves |
Ideal for non-flat surfaces like pipes |
Avoid stretching the tape to maintain adhesive strength |
|
Outdoor Surfaces |
UV-Resistant Exterior Tape |
UV protection, weather-resistant |
Exposed outdoor applications |
Consider environmental factors like humidity and temperature |
Additional Considerations
- Contaminants: Clean the surface thoroughly to remove any contaminants that can affect tape adhesion.
- Temperature: Use tapes that can withstand the environmental temperature during application and throughout the project duration.
- Adhesion Needs: Match the tape’s adhesive strength to the surface texture and material to prevent damage during removal.
Techniques for Smooth Application of Painter’s Tape
When applying painter’s tape, the goal is to ensure it adheres well and leaves no gaps for paint to seep through, resulting in sharp, clean lines. Below are detailed, practical techniques and tools you can use to apply painter’s tape smoothly:
|
Technique |
How to Do It |
Tools Needed |
Tips for Best Results |
|
Aligning the Tape |
Apply tape in manageable lengths, aligning carefully along the edge. |
None |
Keep the tape aligned with the edge; avoid stretching it to prevent warping. |
|
Securing the Tape |
Press down firmly from the center out to the edges. |
Putty knife or plastic card |
Use gentle pressure to smooth out the tape and eliminate any bubbles. |
|
Removing Air Bubbles |
After application, inspect and press out any visible bubbles. |
Plastic smoother or dry cloth |
Work from the center outwards to push air bubbles to the nearest edge. |
|
Ensuring Adhesion |
Burnish (rub) the tape to enhance its grip on the surface. |
Cloth or burnishing tool |
Rub the tape, especially the edges, to ensure it sticks fully without gaps. |
|
Creating a Moisture Barrier |
In humid conditions, wipe the edge of the tape with a damp cloth. |
Damp cloth |
This helps seal the edge of the tape against moisture that could undermine adhesion. |
|
Testing the Tape |
Apply a small test strip to check for residue and ease of removal. |
None |
This is crucial on delicate surfaces or where paint curing is uncertain. |
|
0Avoid Heavy Traffic |
Keep the area with the tape free from heavy contact and disturbance. |
Barrier (optional) |
Prevents the tape from being accidentally peeled or moved before painting. |
Frequently Asked Questions
1. What should I do if painter’s tape leaves a sticky residue?
If you find sticky residue after removing the tape, gently wipe the area with a cloth dipped in a solution of warm water and mild dish soap. For tougher residue, lightly dab the area with rubbing alcohol.
2. Can I reuse painter’s tape for multiple coats?
Painter’s tape is generally designed for single use. Reusing it may not give the same sealing effectiveness, which can lead to paint bleeds.
3. How long can I leave painter’s tape on after painting?
It’s best to remove painter’s tape within 24 or 48 (max) hours after painting. Leaving it on longer can make removal more difficult and may damage the paint.
4. What if the paint peels off with the tape?
If paint comes off with the tape, it usually means the paint hadn’t fully cured before tape removal. To fix this, lightly sand the peeled area and touch up with a small amount of paint.
5. Is there a difference in tape removal technique for textured surfaces?
For textured surfaces, use low-tack tape and remove it slowly at a 45-degree angle. This helps prevent the paint from pulling up with the tape.
6. How can I prevent paint from bleeding under the tape?
Ensure the tape is firmly pressed down along the edges. Apply a clear glaze or the same color of the base coat along the edge of the tape before painting the top coat. This seals the edges and prevents bleeding.
7. What should I do if the tape tears during removal?
If the tape tears, use a razor blade or putty knife to lift the edge gently and continue peeling. Proceed slowly to minimize further tearing.