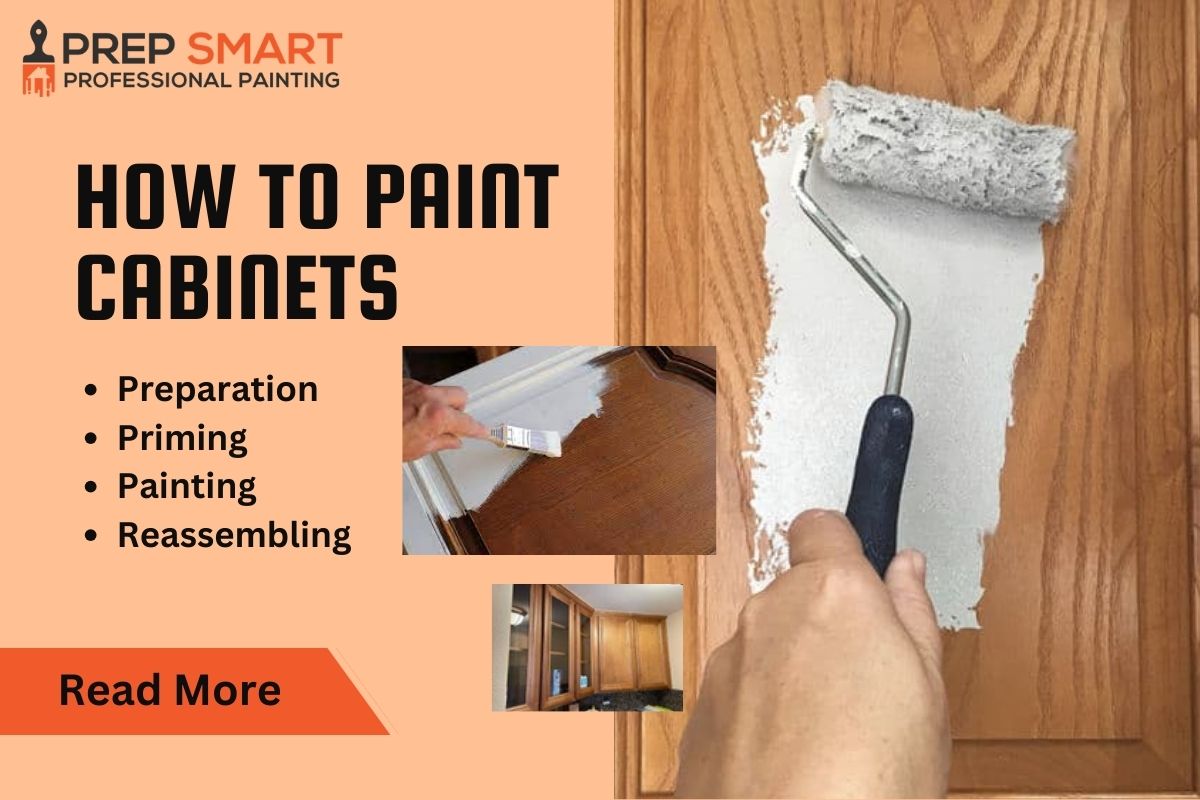
HOW TO PAINT CABINETS
Table of Contents
Painting cabinets is an excellent way to refresh the look of your kitchen or bathroom affordably. Whether you’re a seasoned DIY enthusiast or just starting out, this guide is designed to help you grasp how to paint cabinets effectively. You’ll learn about the straightforward process, the notable advantages, and the usual pitfalls to steer clear of. By the end of this guide, you’ll be ready to transform your space with confidence and ease, making it look as good as new without breaking the bank.
Benefits of Painting Cabinets
Painting your kitchen cabinets can breathe new life into the heart of your home. It’s not just about aesthetics; it’s an upgrade that brings multiple practical benefits. Here are the key advantages:
- Cost-Efficient: Instead of buying new cabinets, painting is a much more budget-friendly option.
- Quick Transformation: Compared to a full renovation, painting cabinets is a faster way to change your kitchen’s look.
- Customization: Select from a wide range of colors and finishes to tailor the appearance to your exact preferences.
- Increased Home Value: A well-executed cabinet painting can boost the overall value of your home, appealing to potential buyers with its modern look.
- Improved Cleanliness: New paint makes cabinets easier to clean, as most paints are resistant to the buildup of dirt and grime.
- Aesthetic Improvement: Refresh and modernize an outdated kitchen to make your space more inviting.
- Personal Satisfaction: Enjoy the satisfaction of a DIY project that transforms your kitchen into a space you love.
Preparation
Proper preparation is the key to a successful cabinet painting project. Start by gathering all the necessary tools and materials. This ensures you’re fully equipped to handle each step smoothly, from cleaning and sanding to the final touches.
1. Gather Your Materials
Before you begin, it’s crucial to collect all the materials you’ll need for the project. Having everything on hand will help streamline the process, allowing for a smooth and uninterrupted workflow as you move from preparation to painting
|
Material |
Description |
|
Sandpaper |
120- and 220-grit for removing old finishes and smoothing |
|
Primer |
Essential for ensuring paint adherence and even coverage |
|
Paint |
Choose between latex or oil-based depending on your preference |
|
Brushes and Rollers |
Needed for applying primer and paint |
|
Painter’s Tape |
Protects areas you don’t want painted |
|
Drop Cloths |
Keeps your floors and countertops clean |
|
Screwdriver |
For removing hardware from the cabinets |
|
Cleaning Supplies |
Mild detergent, water, and sponge for cleaning surfaces |
Ensure all materials are ready and within reach before you start, to make the painting process as efficient as possible.
2. Clean and Remove Hardware
Properly cleaning and removing hardware from your cabinets is essential to prepare them for a flawless painting job.
- Remove Cabinet Doors and Hardware: Carefully detach the doors and all hardware components such as hinges, knobs, and pulls. This makes the painting process easier and prevents paint from getting onto the hardware.
- Clean Surfaces: Use a mild detergent to thoroughly clean all cabinet surfaces. This step is crucial to remove any accumulated grease, dirt, or grime
- Rinse and Dry: After cleaning, rinse the surfaces with clean water. Allow everything to dry completely to ensure the best adhesion for the primer and paint.
3. Sanding the Cabinets
Sanding is vital to remove the old finish and create a smooth base for the new paint, promoting better adhesion and a smoother finish.
- Sand with 120-Grit Sandpaper: Start by sanding all cabinet surfaces with 120-grit sandpaper. This coarser sandpaper helps remove the old layers of paint and finish.
- Smooth with 220-Grit Sandpaper: After removing the old finish, use 220-grit sandpaper to smooth out the surfaces. This finer sandpaper prepares your cabinets for a professional-quality finish.
- Wipe Away Dust: After sanding, it’s important to clean off any remaining dust. Use a damp cloth to wipe down the surfaces, ensuring they are clean and ready for priming.
When it comes to painting cabinets, sanding is a common step that helps ensure the paint adheres well and creates a smooth finish. However, if you’re looking to skip this step, perhaps due to time constraints or the condition of your cabinets, there are alternatives. For those interested in learning how to bypass the sanding process, we have a detailed guide on our blog. Check out our article, How to Paint Cabinets Without Sanding, where we explore specialized techniques and products that allow you to paint directly over old finishes, saving time and effort while still achieving a refreshed look. This approach can be particularly useful for those looking to minimize dust and labor involved in the prep work.
Priming
Priming is an essential first step in the cabinet painting process, ensuring optimal paint adhesion and a uniform finish. This section will guide you through choosing and applying the right primer for your cabinet material.
1. Choosing the Right Primer
When embarking on your cabinet painting project, selecting the right primer is crucial.Here’s how to choose the best primer for your cabinets, whether they’re made of wood, laminate, or metal:
Factors to Consider When Choosing a Primer:
- Compatibility with Cabinet Material: Different materials require different types of primer. For wood cabinets, look for a primer that seals the wood and prevents moisture absorption. For laminate or metal, a bonding primer is essential to ensure the paint sticks properly.
- Stain Blocking: If your cabinets have visible stains or are a darker color, a stain-blocking primer will help cover these imperfections and prevent them from bleeding through the new paint.
- Odor and VOC Levels: Consider the level of volatile organic compounds (VOCs) and the odor of the primer. Water-based primers typically have lower VOCs and less odor, making them a better choice for indoor projects.
- Drying Time: Different primers have different drying times. If you’re on a tight schedule, look for a fast-drying primer that allows you to start painting sooner.
2. Applying the Primer
Properly applying primer is as important as choosing the right one. Here are the steps to ensure a smooth and effective application:
Step 1: Prepare Your Tools
Choose a high-quality brush or roller that is suitable for the type of primer you are using.
Step 2: Apply a Thin, Even Coat
Dip your brush or roller into the primer and apply a thin, even coat to the surface of the cabinets. Ensure you cover all areas uniformly, avoiding drips or excess primer.
Step 3: Allow the Primer to Dry
Refer to the manufacturer’s instructions for the specific drying time. It’s crucial to let the primer dry completely before moving to the next step. Drying times can vary based on humidity and temperature.
Step 4: Sand the Primed Surface
Once the primer is dry, lightly sand the surface with 220-grit sandpaper. This step is important to achieve a smooth base for the paint and helps to remove any minor imperfections and roughness caused by the primer.
Step 5: Clean the Surface
After sanding, wipe away all the dust with a clean, damp cloth to ensure a clean surface for painting. Any remaining dust can interfere with the adhesion of the paint.
If you’re curious about the time it takes to paint cabinets, Prep Smart Painting has a concise guide for you. Visit our article, How Long Will It Take to Paint Cabinets, for an efficient breakdown of the process and time estimates to help you manage your project smoothly
Painting
Painting your cabinets is an effective way to refresh your space and add personal style. This section will guide you through selecting the right paint and applying it to achieve a professional, durable finish.
1. Selecting the Paint
When it comes to giving your cabinets a fresh coat of paint, the selection of the right product is essential. Consider these factors when choosing your paint:
- Durability: Look for paint that offers long-lasting wear. Oil-based paints are renowned for their durability and smooth finish, making them a great choice for cabinets that undergo frequent use.
- Ease of Cleaning: Kitchens and bathrooms are prone to messes, so choosing a paint that’s easy to clean is critical. Semi-gloss and gloss finishes are excellent as they allow for easier wipe-down and resist moisture better than matte finishes.
- Type of Paint: Decide between latex and oil-based paints based on your specific needs. Latex paints dry faster and have a lower odor, which might be preferable if you need a quicker turnaround or are sensitive to strong smells.
- Aesthetic Appeal: The finish of your paint can affect the overall look of your cabinets. Glossy finishes tend to highlight imperfections but are more durable and easy to clean, while semi-gloss provides a balance between sheen and masking flaws.
2. Applying the Paint
Proper application is key to achieving a beautiful and durable finish on your cabinets. Follow these steps:
Step 1: Apply the First Coat
Utilize a high-quality brush or roller to apply the first coat of paint, making sure to follow the grain of the wood. This technique helps to enhance the natural beauty of the material.
Step 2: Let the Paint Dry
Allow the first coat to dry completely. Refer to the paint can for specific drying times, which can vary based on the type of paint and ambient conditions.
Step 3: Sand Between Coats
After the first coat has dried, lightly sand the surface with 220-grit sandpaper. This will smooth out any bumps or imperfections and provide a better surface for subsequent coats.
Step 4: Apply the Second Coat
Apply a second coat of paint for even coverage and a smooth, professional finish. This layer ensures that your cabinets will look great and their surface will be well-protected.
If you’re planning to refresh your kitchen by painting over cabinets that are already painted, you might be wondering about the best practices to ensure a smooth and durable finish. We’ve got you covered with a detailed guide on our blog. For a step-by-step tutorial and expert tips, visit our article, How to Paint Cabinets That Are Already Painted. This resource will help you navigate the nuances of choosing the right paint, preparing the surface without complete sanding, and applying the paint for a professional-looking outcome.
Reassembling
After the fresh paint has dried, it’s time to put everything back together. This section focuses on attaching the hardware and making the final touches to ensure your cabinets look their best.
1. Attaching Hardware
Reattaching the hardware to your cabinets is a straightforward but crucial step. It’s also an excellent opportunity to upgrade your handles and knobs to enhance the overall appearance of your refreshed cabinets.
- Check the Dryness: Before starting, make sure that the paint is completely dry to prevent any damage.
- Align the Hardware: Position the hardware correctly, using the existing holes or marking new ones if you’re installing different types.
- Secure the Hardware: Attach each piece firmly with a screwdriver, ensuring everything is tight and properly aligned.
2. Final Touches
The final touches are key to achieving a professional finish. This involves inspecting for any imperfections and cleaning up your workspace.
- Inspect the Cabinets: Go over your cabinets to spot any missed areas or potential improvements.
- Touch-Ups: Apply touch-ups where necessary using a small brush, aiming for a seamless finish.
- Remove Painter’s Tape: Gently peel off any painter’s tape. This should be done slowly to avoid pulling up any fresh paint.
- Clean Up: Clear away any debris, dust, or leftover materials. A clean work area complements your newly painted cabinets and enhances the overall freshness of the space.
By carefully reassembling and adding the final touches, you ensure that your newly painted cabinets not only look great but are also functional and neatly finished.
Maintaining Your Painted Cabinets
To keep your freshly painted cabinets looking their best over time, a bit of regular care and timely maintenance can go a long way. Here are some straightforward tips on how to keep your cabinets in top condition:
Cleaning Tips
- Gentle Cleaning: For routine cleaning, use a soft cloth or sponge with mild soap and water. This will remove everyday dirt and grease without damaging the paint finish.
- Avoid Harsh Chemicals: Steer clear of abrasive cleaners, strong detergents, and scouring pads. These can scratch the paint surface or cause it to peel.
- Regular Wipe-Downs: Especially in areas prone to grease accumulation, like above the stove, frequent wiping can prevent long-term stains and buildup.
Touch-Up Tips
- Keep Extra Paint: Save some of the paint you used in an airtight container. This will be handy for quick touch-ups if the paint gets nicked or scratched.
- Prompt Repairs: Address any chips or scratches quickly to prevent the wood underneath from being exposed to moisture or pests, which could cause further damage.
- Spot Treatment: For small imperfections, use a small artist’s brush to apply touch-up paint, which will blend seamlessly with the surrounding area.
Additional Maintenance Tips
- Use Protective Liners: Inside the cabinets, use shelf liners to protect the surface from scratches and spills. These liners can be easily replaced or cleaned and will keep the interior looking new.
- Regular Hardware Check: Periodically check and tighten hardware, such as handles and hinges. Loose hardware can lead to misalignment and damage to the doors and their paint.
- Avoid Direct Sunlight: If possible, prevent prolonged exposure to direct sunlight, which can fade painted surfaces over time. Use curtains or blinds to minimize sun exposure on your cabinets.
By incorporating these maintenance practices, you can extend the life and beauty of your painted cabinets, ensuring they remain a vibrant part of your kitchen’s décor for years to come.
Safety and Ventilation
Ensuring safety and maintaining proper ventilation are critical when undertaking any painting project, especially indoors. This section highlights the necessary safety precautions and the importance of environmentally responsible disposal of painting materials.
1. Safety Precautions
When painting cabinets, it’s essential to protect yourself from the potential hazards associated with paint and primer chemicals.
- Wear Protective Gear: Always use gloves, masks, and safety glasses while painting. This gear protects you from chemical irritants and prevents the inhalation of fumes.
- Ventilation: Keep your workspace well-ventilated. Open windows and doors, or use fans to circulate air and disperse fumes more quickly.
- Read Labels: Be aware of the safety information on all paint products and follow any recommended safety guidelines.
2. Proper Disposal
Proper disposal of paint and painting supplies is not only important for environmental health but also for following local regulations.
- Recycle: Check if your local area offers recycling options for leftover paint. Many communities have programs that allow for the recycling of unused paint.
- Proper Disposal Methods: For paint that cannot be recycled, follow local guidelines for disposal. Never pour paint down drains or into the ground.
- Dispose of Rags and Brushes: Clean brushes and rollers with the appropriate solvents, and make sure to dispose of any used rags and disposable tools in accordance with local waste management regulations.
Common Mistakes and Solutions
Even the best DIY projects can hit snags. Here we’ll tackle common cabinet painting issues and offer quick, effective solutions to keep your project on track.
|
Common Mistakes |
Solutions |
|
Not Testing Your Paint Color |
Test paint colors inside of a cabinet door to see how it looks in different lighting. If it’s not right, test another color. |
|
Skipping Painting Prep |
Ensure thorough cleaning, sanding, and priming to enhance paint adhesion and durability. |
|
Not Prepping Correctly for Cabinet Material |
Adjust your prep technique based on whether your cabinets are wood, MDF, or a different material like laminate. |
|
Insufficient Area Prep |
Properly tape off areas and cover items in the kitchen to prevent unwanted paint spills. |
|
Leaving the Doors and Hardware On |
Remove doors and hardware for even painting and to avoid painting mishaps. |
|
Painting Over Grease |
Use a degreaser to clean off grease and oils from cabinets for better paint adherence. |
|
Over-Sanding, or Not Sanding |
Sand surfaces just enough to roughen them up without damaging; light sanding between coats can also help. |
|
Using the Wrong Paint Applicator |
Invest in quality brushes and rollers suitable for the specific areas and finishes of your cabinets. |
|
Skipping the Primer Coat |
Apply a primer coat, especially when changing from a dark to a light color, to ensure even coverage and conceal stains. |
|
Using the Wrong Paint Finish |
Opt for a durable, moisture-resistant semi-gloss or gloss finish for easier cleaning and longevity. |
|
Rushing the Drying Time |
Allow paint to cure for at least 48 hours before reassembling cabinets to avoid sticking doors and paint damage. |
Seasonal Considerations for Painting Cabinets
Choosing the right time of year to paint your cabinets can significantly affect the quality and ease of your project. Here’s what to consider:
Spring:
- Advantages: Spring usually offers the most consistent mild temperatures and moderate humidity levels, ideal for painting.
- Considerations: Watch out for pollen in the air, which can stick to wet paint and affect the finish. It’s best to paint on clear, pollen-free days and ensure that your workspace is well-sealed if outdoors.
Summer:
- Advantages: Longer daylight hours give you more time to work on your project.
- Considerations: Avoid painting during peak heat hours (midday to early afternoon). Early mornings or late afternoons are more suitable. Ensure good ventilation if working indoors, as fumes from paints can be more potent at higher temperatures.
Fall:
- Advantages: Like spring, fall provides a good balance of cool temperatures and reduced humidity, which is excellent for paint drying.
- Considerations: Be mindful of falling leaves and debris, especially if you’re working in a space that might be open to the outdoors. Also, daylight hours are shorter, so plan your timing carefully.
Winter:
- Advantages: You’ll have fewer issues with humidity, which can be a problem in other seasons.
- Considerations: The cold can drastically slow down the drying process. If you’re painting indoors, make sure the room is adequately heated to around 70°F. However, avoid direct heat on the surfaces being painted, as this can cause the paint to blister or crack.
Timing your cabinet painting project with the right season can significantly enhance the outcome. For specific advice on painting over stained cabinets, check out our guide, How to Paint Cabinets That Are Stained, to ensure a flawless finish.
Conclusion
Transforming your cabinets with paint is an incredibly rewarding endeavor that brings new life to your kitchen or bathroom in a cost-effective and creative way. By following the detailed steps outlined in this guide on how to paint cabinets, you’re equipped to achieve a professional-grade finish that not only enhances the aesthetic of your space but also increases its functionality and appeal. Whether you are updating an old look or starting from scratch, the process of painting your cabinets allows for personal expression and a custom feel in your home.
Take your time to carefully prepare, paint, and finish your cabinets, as these are the keys to ensuring a durable and beautiful outcome. Remember, the journey of personalizing your home should be as enjoyable as the results. If you ever need high-quality painting supplies or further guidance, consider checking out Prep Smart Painting. Their expertise can help you smoothly navigate your cabinet transformation project, ensuring that every brushstroke contributes to the final masterpiece. For additional insights, especially on handling laminate cabinets, visit our detailed article at Prep Smart Painting’s site: “How to Paint Cabinets That Are Laminate“
Frequently Asked Questions
1: What Should I Do If the Paint Isn’t Sticking to the Cabinets?
Answer: If paint isn’t adhering, it’s likely due to a surface that wasn’t cleaned or sanded properly. Ensure all surfaces are free of grease, dust, and debris before applying primer. A light sanding will also help create a surface that the paint can bond to more effectively.
2: How Can I Prevent Brush Marks and Streaks?
Answer: To avoid brush marks and streaks, it’s essential to use high-quality brushes and rollers, which help ensure a smooth application. Apply the paint in thin, even layers rather than one thick coat. For water-based paints, consider using a paint extender, which can slow down the drying time and improve the flow of the paint, reducing brush marks.
3: What Do I Do If the Paint Dries Too Fast and Becomes Tacky?
Answer: If your paint is drying too quickly and becoming tacky, try working in a cooler environment or use a slower-drying paint. You can also add a paint conditioner to latex paints, which helps extend the drying time and improves the paint’s flow.
4: How Do I Fix Drips and Runs in the Paint?
Answer: To fix drips and runs, wait until the paint has dried completely, then sand the area smooth and repaint it. To prevent this issue, apply paint in several lighter coats instead of one heavy coat.
5: How Should I Deal With Paint Build-Up Around Edges and Detail Work?
Answer: For detailed areas, use a smaller brush and apply paint sparingly. If buildup does occur, gently sand these areas between coats to maintain a smooth finish.
6: What Can I Do If the Paint Color Doesn’t Look the Way I Expected?
Answer: Lighting can dramatically affect how paint colors appear. If the color isn’t what you expected, try viewing it under different lighting conditions, or consider applying a different shade. Always test paint colors with samples before committing to painting all your cabinets.
7: How Do I Maintain the Finish on My Painted Cabinets?
Answer: To maintain your cabinets, clean them regularly with a soft cloth and mild soap. Avoid using abrasive cleaners or pads, which can scratch the surface. Touch up any chips or scratches promptly to protect the wood beneath from moisture.