How to Paint Kitchen Cabinets Without Sanding: A Comprehensive Guide
Table of Contents
Purpose of the Guide
This guide is here to help you paint kitchen cabinets without sanding. It’s designed for anyone looking to update their kitchen cabinets easily and efficiently. Whether you’re a DIY enthusiast or a first-timer, this guide will make the process simple and stress-free. We aim to show you how you can transform your kitchen cabinets with minimal effort and maximum results.
Overview of the Process
We’ll walk you through every step of how to paint cabinets without sanding, from the initial preparation to the final touches.. You’ll learn about the tools and materials needed, the best paints and primers, and the techniques for achieving a smooth, professional finish. By following these steps, you’ll see how easy it is to repaint kitchen cabinets and give your kitchen a fresh new look. This process involves cleaning, applying a deglosser, using a bonding primer, and then painting your cabinets to perfection.
Importance of Updating Cabinets
Updating your kitchen cabinets can completely transform the look and feel of your space. Learning how to paint cabinets without sanding saves you time and effort while still giving you beautiful results. It’s a cost-effective way to refresh your kitchen without the mess and hassle of traditional methods. New paint can make old cabinets look brand new, adding value to your home and enhancing your daily living environment.
Benefits of Painting Cabinets Without Sanding
Learning how to paint kitchen cabinets without sanding offers a quick and efficient way to refresh your space without the hassle of extensive preparation.
- Time-Saving Advantages:
Painting kitchen cabinets without sanding significantly reduces the project time, allowing you to quickly move from preparation to painting. This method lets you complete the transformation in a weekend instead of spending several days or weeks. - Cost-Effectiveness:
Using no sanding paint for cabinets eliminates the need for additional materials like sandpaper and sanding blocks, making the project more budget-friendly. You can achieve a professional look without the extra expense of sanding supplies. - Less Mess and Dust:
Painting cabinets without sanding generates much less dust and debris, resulting in a cleaner workspace. This method minimizes the cleanup required after the project, making the process more convenient and less disruptive. - Preservation of Cabinet Material:
Skipping the sanding process helps preserve the original material of your cabinets, especially beneficial for older or delicate surfaces. This technique ensures your cabinets remain in good condition while you refresh their appearance. - Easier for Beginners:
Painting kitchen cabinets without sanding simplifies the process, making it more accessible for DIY beginners. Without the need for extensive preparation, even first-timers can achieve professional-looking results. - Eco-Friendly Option:
Avoiding sanding reduces the amount of dust and particles released into the air, making it a more environmentally friendly option. Additionally, using low-VOC paints can further reduce the environmental impact. - Immediate Transformation:
By painting cabinets without sanding, you can see immediate results. This method allows for a quicker and more noticeable transformation of your kitchen space, enhancing your home’s aesthetic appeal in a short time.
Tools and Materials Needed
In addition to the general tools used for painting cabinets, such as paintbrushes, rollers, and screwdrivers, there are specific tools and materials required to paint your kitchen cabinets without sanding. These specialized items ensure that the paint adheres properly and provides a smooth, durable finish.
Essential Tools for No-Sanding Method
-
Deglosser or Liquid Sandpaper:
- Purpose: These products help to dull the surface of the cabinets, allowing the primer and paint to adhere properly without the need for sanding.
- Application: Follow the manufacturer’s instructions for the best results.
-
High-Quality Bonding Primer
- Purpose: Ensures that the paint adheres well to the cabinet surfaces that have been treated with deglosser.
-
- Recommended Products: Look for primers like Zinsser Bullseye 1-2-3 or Kilz Adhesion.
-
Durable, Cabinet-Grade Paint:
-
- Purpose: Provides a long-lasting finish that withstands the wear and tear of a kitchen environment.
- Recommended Products: Use paints specifically formulated for cabinets or high-traffic areas.
- Paint Sprayer (Optional):
- Purpose: Provides a more professional, smooth finish.
- Details: Useful for achieving an even coat quickly and efficiently.
These specific tools and materials are essential for painting kitchen cabinets without sanding, ensuring that you achieve the best possible results with minimal effort.
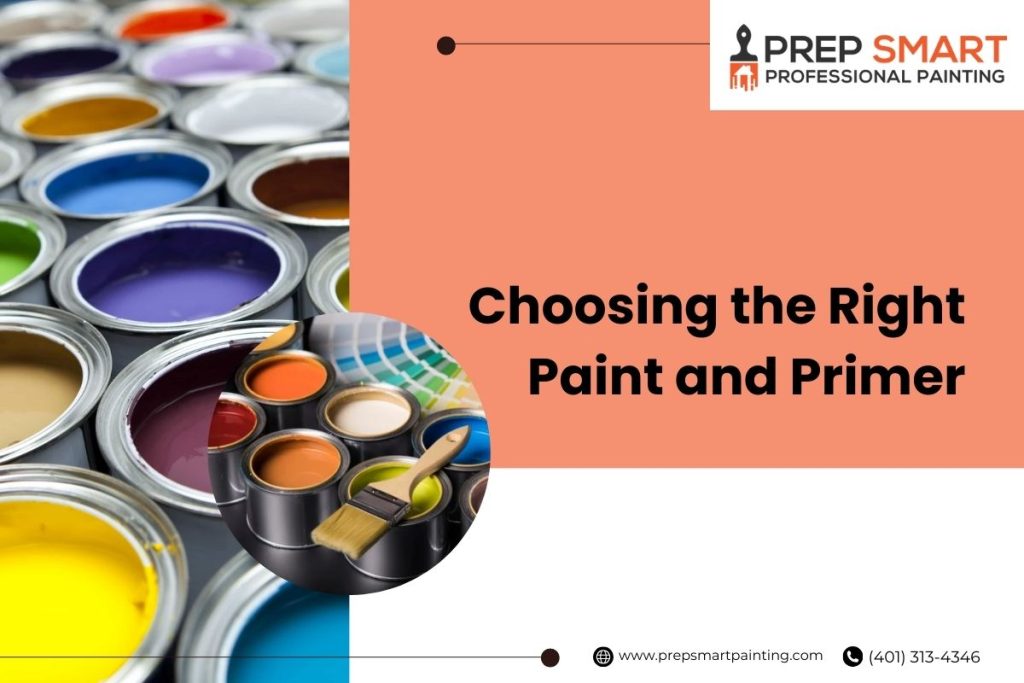
Choosing the Right Paint and Primer
Selecting the appropriate paint and primer is crucial for a durable and beautiful finish when painting kitchen cabinets without sanding. This section will help you understand the types of paint suitable for cabinets, the importance of primer, and recommend high-quality,
| Paint Type | Description | Advantages | Application Method |
| Chalk Paint | Water-based paint that adheres well to surfaces without sanding. |
|
|
| Milk Paint | Natural, water-based paint that can be used without sanding. |
|
|
| Bonding Primer + Latex Paint | Primer creates a smooth surface for latex paint to adhere without sanding. |
|
|
| Acrylic Enamel | Hybrid of acrylic and enamel paints; sticks well without sanding. |
|
Brush or roller |
| Self-Priming Paint | Paint that includes primer, reducing the need for separate priming or sanding. |
|
Brush, roller, or sprayer |
Why These Paints Are Suitable Without Sanding:
1. Adhesion Properties:
- Chalk Paint and Milk Paint: These paints are designed to adhere well to various surfaces, including previously finished cabinets, without the need for sanding. The composition of these paints allows them to grip onto the surface effectively.
- Bonding Primers: These primers are formulated to stick to glossy surfaces, creating a good base for the latex paint to adhere to, eliminating the need for sanding.
- Acrylic Enamel: This paint combines the best qualities of acrylic and enamel, offering excellent adhesion and a hard finish without requiring sanding.
- Self-Priming Paints: These paints contain a built-in primer, which prepares the surface for painting without the need for sanding.
2. Ease of Application:
- These paints are typically user-friendly, making them suitable for DIY projects. The smooth application process and forgiving nature of the paints reduce the need for extensive surface preparation.
3. Finish Quality:
- These paints provide a high-quality finish that is durable and aesthetically pleasing. The final look is often smooth and professional, even without sanding the cabinets beforehand.
Using these paints can save time and effort while still achieving a professional-looking finish on cabinets.
Importance of Primer
- Adhesion: A high-quality primer ensures that the paint adheres well to the cabinet surface, especially important when painting cabinets without sanding.
- Stain Blocking: Primers can block stains, tannins, and previous finishes from bleeding through the new paint.
- Smooth Surface: Priming provides a smooth, even surface for the paint, enhancing the final appearance.
- Durability: Using a primer increases the durability of the paint, helping it to withstand daily wear and tear in a kitchen environment.
- Coverage: Primer helps the paint cover better, reducing the number of coats needed and improving the overall finish.
Recommendations for High-Quality Products
- Bonding Primers: These are designed to adhere to difficult surfaces without the need for sanding. Brands like Zinsser Bullseye 1-2-3 and Kilz Adhesion are excellent choices.
- Eco-Friendly Primers: Products like EcoPrim Grip by Ecologic or Benjamin Moore Natura Primer are good choices.
- Low-VOC Paints: Brands such as Behr Premium Plus Ultra, Benjamin Moore Eco Spec, and Sherwin-Williams Harmony offer low-VOC options that are safer for indoor use.
Step-by-Step Painting Process
Transforming your kitchen cabinets doesn’t have to involve the messy and time-consuming process of sanding. With PrepSmart Painting techniques and materials, you can achieve a beautiful, professional finish without ever picking up a piece of sandpaper. Here’s how you can do it:
Preparing Your Cabinets
Cleaning the Cabinets: Before starting, make sure your cabinets are free from any grease, grime, or dirt. Use a strong degreaser and a clean cloth to wipe down all surfaces thoroughly. This step is crucial to ensure that the deglosser and primer adhere properly.
Applying Deglosser
- Apply Deglosser: Pour a small amount of deglosser onto a clean cloth and apply it to the cabinet surfaces. Be sure to follow the manufacturer’s instructions for the best results.
- Work in Sections: It’s often easier to work in small sections to ensure even coverage. Apply the deglosser methodically to each part of the cabinet.
- Wipe Off Deglosser: After letting the deglosser sit for the recommended time (usually a few minutes), wipe off any excess with a clean, dry cloth. This step effectively dulls the surface, creating a texture that allows the primer to adhere without sanding.
Using a Bonding Primer
- Choose the Right Primer: Select a high-quality bonding primer specifically designed for surfaces that haven’t been sanded. Products like Zinsser Bullseye 1-2-3 or Kilz Adhesion are excellent choices.
- Apply the Primer: Using a brush or roller, apply an even coat of the bonding primer to all cabinet surfaces. Make sure to cover edges and corners thoroughly to ensure complete adhesion.
- Check for Coverage: Ensure every part of the cabinet is well-covered with the primer. An even application is key to achieving a smooth final paint finish.
- Allow to Dry: Let the primer dry completely. Follow the drying times recommended on the primer’s label, usually around a few hours.
Painting Your Cabinets
Selecting the Paint:
Choose a durable, cabinet-grade paint. Look for paints specifically formulated for cabinets or high-traffic areas to ensure longevity.
Painting Techniques:
- Brush and Roller: Use a brush for detailed areas and a roller for larger, flat surfaces. This helps achieve a smooth, even coat.
- Thin Coats: Apply thin, even coats of paint to avoid drips and ensure a smooth finish. It’s better to apply multiple thin coats rather than one thick one.
- Drying Between Coats: Allow each coat of paint to dry thoroughly before applying the next. This usually takes a few hours per coat.
Other Essential Steps
All other steps, such as ensuring proper ventilation, using painter’s tape to protect areas you don’t want to be painted, and reattaching hardware once the paint is fully cured, are similar to those in normal cabinet painting.
Ventilation and Safety: Ensure your workspace is well-ventilated. Wear masks and gloves to protect yourself from fumes and chemicals.
Reattaching Hardware: Once the paint is fully cured, reattach all hardware. Make sure doors and drawers are properly aligned and functioning smoothly.
By following these steps, you can successfully paint your kitchen cabinets without the hassle of sanding, giving your kitchen a fresh, new look with minimal effort. For a more detailed guide on the entire process, refer to the blog by Prep Smart titled “How to Paint Cabinets.“
Tips for a Professional Finish
Achieving a professional finish when painting kitchen cabinets without sanding requires attention to detail and a few expert techniques. These tips will help you avoid common mistakes and ensure your cabinets look their best.
Avoiding Common Mistakes
- Proper Preparation: Ensure your cabinets are thoroughly cleaned and properly prepped. Skipping this step can lead to poor paint adhesion and a less durable finish.
- Using Quality Materials: Invest in high-quality paints and primers specifically designed for cabinets. Low-quality products can result in a subpar finish.
- Patience with Drying Times: Rushing the process by not allowing adequate drying time between coats can lead to smudges and an uneven finish.
Handling Drips and Streaks
- Thin Coats: Apply thin, even coats of paint to avoid drips and streaks. Multiple thin layers are better than one thick coat.
- Watch for Drips: Check for drips as you paint, especially around edges and corners. Use a brush to smooth out any drips immediately.
- Proper Technique: When using a brush, use long, smooth strokes to minimize streaks. If using a roller, roll in one direction and overlap slightly.
Techniques for Detailed Areas
- Small Brushes: Use small, angled brushes for detailed areas and hard-to-reach spots. This ensures you get an even coat of paint in all areas.
- Painter’s Tape: Use painter’s tape to protect areas you don’t want painted and to achieve clean, sharp lines.
Curing and Reassembling
After successfully following the steps on How to paint kitchen cabinets without sanding, the final steps involve allowing proper drying and curing time, reattaching hardware, and performing final inspections.
1. Allowing Proper Drying and Curing Time
- Drying Time: After applying the final coat of paint, allow ample time for the paint to dry completely. This typically takes 24-48 hours, but refer to the paint manufacturer’s recommendations for exact times.
- Curing Time: For the paint to fully cure and reach maximum hardness, it can take up to a few weeks. During this period, avoid heavy use of the cabinets to prevent damage.
2. Reattaching Hardware
- Clean Hardware: Before reattaching, clean the cabinet hardware (handles, knobs, hinges) to remove any dust or paint residue.
- Reinstall Hardware: Carefully reattach all hardware using a screwdriver. Ensure that all screws are tightened securely but avoid over-tightening, which can strip the screw holes.
- Align Doors and Drawers: Make sure all cabinet doors and drawers are properly aligned and open and close smoothly.
3. Final Touches and Inspection
- Inspect for Imperfections: Check the painted surfaces for any drips, streaks, or missed spots. Touch up these areas with a small brush.
- Smooth Surface: If necessary, lightly sand any rough spots and apply a final touch-up coat of paint.
- Remove Painter’s Tape: Carefully remove any painter’s tape used to protect areas during painting. Do this slowly to avoid peeling off any paint.
4. Ensuring Cabinet Functionality Post-Painting
- Test Doors and Drawers: Open and close all doors and drawers to ensure they operate smoothly. Adjust any misaligned hardware if needed.
- Soft Close Mechanisms: If your cabinets have soft-close mechanisms, make sure they are working correctly after reinstallation.
- Final Clean-Up: Wipe down the cabinets with a soft, dry cloth to remove any remaining dust or debris. Clean the surrounding area to complete the project.
By following these steps, you can ensure that your project of painting kitchen cabinets without sanding results in a beautifully finished and fully functional kitchen. Proper curing, careful reassembly, and attention to final details will give your cabinets a professional look and long-lasting durability.

Maintenance and Care for Painted Kitchen Cabinets
Proper maintenance and care are crucial to keep your no-sanding painted kitchen cabinets looking fresh and beautiful for years to come. Here are some specific tips tailored for cabinets painted without sanding:
Gentle Cleaning: Avoid using harsh chemicals or abrasive scrubbers, as surfaces prepared without sanding may be more susceptible to scratches.
Precise Touch-Ups: Use small, fine-tipped brushes for precise touch-ups on minor chips or scratches. This ensures you only paint the affected area and maintain a smooth finish.
Chemical-Free: Keep strong cleaning agents, such as bleach and ammonia, away from your painted cabinets. These can strip the paint and cause discoloration, which is particularly important for surfaces treated without sanding.
Summer Care: In summer, use a dehumidifier or air conditioning to maintain a consistent humidity level in your kitchen. High humidity can cause the paint to swell and peel.
Early Detection: Periodically inspect your cabinets for any signs of wear or damage. Addressing issues early can prevent more extensive repairs later on.
By following these maintenance and care tips, you can ensure the longevity and pristine condition of your painted kitchen cabinets, preserving the integrity of your no-sanding paint job.
Troubleshooting Common Issues
Even with the best preparation and techniques, issues can sometimes arise when painting kitchen cabinets without sanding. This table provides solutions for common problems you might encounter.:
|
Issue |
Solution |
|
Peeling Paint |
Lightly sand the affected area, apply a bonding primer, and repaint with durable cabinet paint. |
|
Paint Discoloration or Yellowing |
Use high-quality, UV-resistant paint and apply a clear topcoat. |
|
Bubbling or Blistering Paint |
Ensure surfaces are dry before painting and avoid high humidity; sand bubbled areas, prime, and repaint. |
|
Uneven Finish |
Apply paint evenly and sand lightly between coats. |
|
Chipping or Cracking Paint |
Use durable, cabinet-grade paint and apply a protective topcoat. |
|
Brush Marks or Streaks |
Use high-quality brushes and apply long, even strokes; sand lightly between coats. |
|
Inconsistent Color |
Mix paint thoroughly before application and apply multiple thin coats. |
|
When to Consider Professional Help |
Seek professional help for severe damage or complex repairs. |
Additional Tips and Hacks
Enhance the look of your painted kitchen cabinets with these additional tips and hacks. From decorative finishes to repurposing leftover paint, these ideas can add a unique touch to your kitchen.
- Using Decorative Finishes (e.g., Glaze, Stencils)
Add depth and dimension to your cabinets with a glaze. Apply over the paint and wipe off to highlight the details and edges. Use stencils to create intricate designs or patterns on your cabinet doors, adding a personalized and artistic flair to your kitchen. - Upgrading Hardware for a New Look
Replace old hardware with modern or stylish handles and knobs. This simple change can significantly update the look of your cabinets. Choose hardware finishes that complement your kitchen decor, such as brushed nickel, matte black, or antique brass. - Coordinating Cabinet Colors with Kitchen Decor
Select cabinet paint colors that match or complement your kitchen’s overall color scheme. Neutral colors like white, gray, or beige are versatile and timeless. Use bold colors for an accent, like a kitchen island or a few upper cabinets, to create visual interest and contrast. - Repurposing Leftover Paint for Other Projects
Use leftover paint to refresh small furniture items like chairs, stools, or shelves, creating a cohesive look in your kitchen. Paint picture frames, flower pots, or other decorative items to match your newly painted cabinets. Keep some leftover paint handy for future touch-ups on your cabinets or other painted surfaces in your home.
FAQs
1. Can I paint over laminate cabinets without sanding?
Yes, you can paint over laminate cabinets without sanding by using a deglosser to prepare the surface and a high-quality bonding primer to ensure the paint adheres properly.
2. What type of paint is best for kitchen cabinets?
The best paint for kitchen cabinets is typically a durable, cabinet-grade paint such as acrylic, alkyd (oil-based), or enamel. These paints are designed to withstand the wear and tear of daily use.
3. How do I choose the right hardware for my newly painted cabinets?
Choose hardware that complements your kitchen’s overall design and color scheme. Consider the finish (e.g., brushed nickel, matte black) and style (modern, traditional) to enhance the look of your cabinets.
4. How long should I wait between coats of paint?
Allow each coat of paint to dry completely before applying the next one. This usually takes a few hours, but always follow the paint manufacturer’s recommendations for drying times.
5. How do I maintain the finish on my painted cabinets?
Maintain the finish by regularly cleaning your cabinets with a soft, damp cloth and mild detergent. Avoid harsh chemicals and abrasive scrubbers. Additionally, perform touch-ups as needed to keep the paint looking fresh.
6. Can I use leftover cabinet paint for other projects in my home?
Yes, leftover cabinet paint can be used for small furniture pieces, decorative items, or touch-ups around your home. Just make sure it’s stored properly and labeled for future use.
7. What should I do if my painted cabinets start to peel?
If your painted cabinets start to peel, lightly sand the affected area, apply a bonding primer, and repaint with a high-quality cabinet paint. Ensure the surface is clean and dry before starting the repair process.